This post will provide you all the information about BuzzTV server setup, including a step-by-step options to setup IPTV service on your BuzzTV box. We have already covered a detailed review on the box on our post at: https://www.wittyedge.com/best-iptv-box-canada-edition/
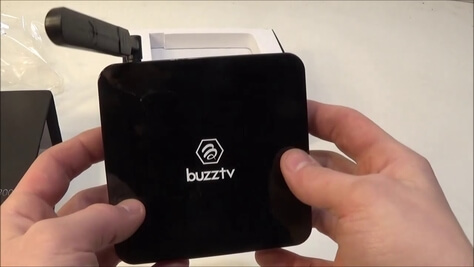
From the above post, you can see that the BuzzTV XPL 3000 is a full-fledged IPTV-focussed set-top box that gives you the best cable-like user experience, coupled with a faster and stable processor.
With the BuzzTV box, you do not need to install any additional IPTV apps, which needs to be done on Apple or Android boxes apps.
Moreover, you get a powerful GPU, 4 times faster CPU, 4K UHD capability, support for h265 video format, etc. that makes the BuzzTV an all-rounder streaming box.
You can also record live tv or video-on-demand content provided by your IPTV service provider, which most devices do not provide.
BuzzTV XPL 3000 works through the Stalker portal support, as well as the Xtreme UI and m3u support. Unlike, the Linux-based MAG boxes, which has issues like buffering or freezing, the BuzzTV is built on the Android operating system, which is much stable and secure to handle any IPTV service.
Quick Features of BuzzTV
- Powered by the Android operating system, outperforms traditional linux set-top boxes.
- Can install more app from the Google App Store, including some of your favourite media player programmes like KODI, Plex, Emby and other Android Apps.
- Clean user experience and easy to setup & opearte just like cable set-top box
- Powerful CPU & GPU support that supports UHD/4K and new h265 video format thus saving on internet data. Capable offline and online streaming content unit
- Comes with ultra-fast channel zapping feature for IPTV, support EPG (TV Guide) and has features like Catch-up to pause, rewind and fast-forward TV
- Provides oouut-of-box support for recording live tv through internet streaming content
You can read more info about various Android streaming boxes, click here.
BuzzTV Server Setup
The steps mentioned below are applicable for all models of BuzzTV IPTV streaming boxes. Just ensure you follow the steps correctly. Based on our experience, the steps on how to install IPTV server on Buzz TV Boxes are simply straight-forward with illustration.
Before we begin, ensure that you are connected to the internet over a wireless connection or the ethernet connection.
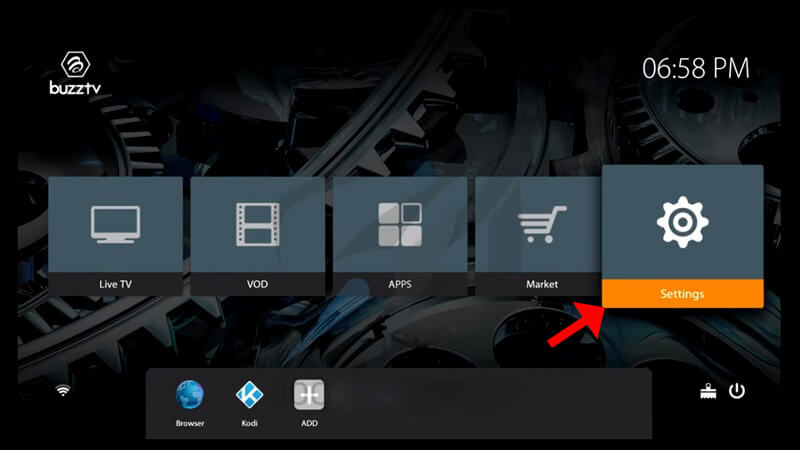
- On the main menu of the UI, use your remote and select Settings.
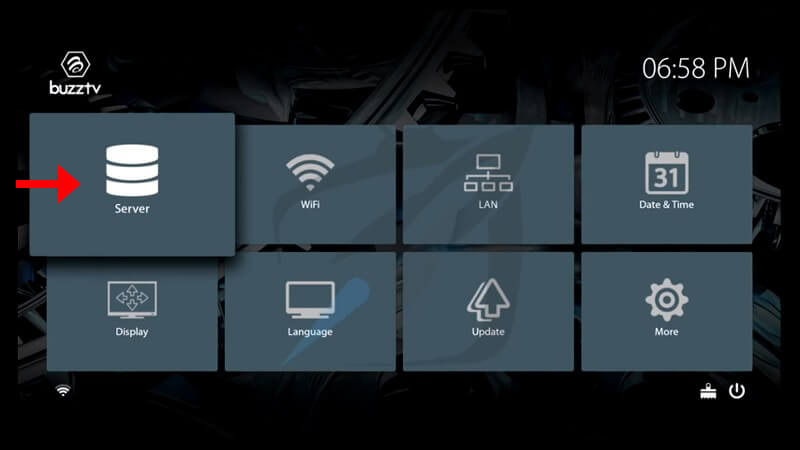
- Then click Servers and proceed to the next step.
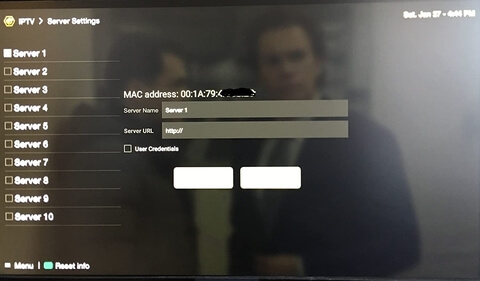
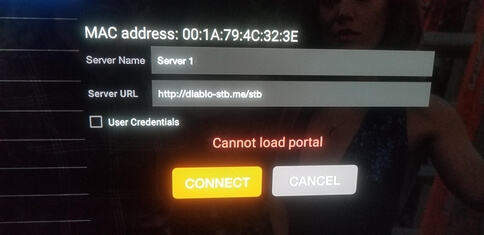
- Select Server 1, and then you can find your MAC ID. Your MAC ID start with 00:1A: …..
- If your IPTV service works through the stalker or the MAC ID option, share the MAC ID of your device with your provider. Your IPTV provider will add your MAC ID to their panel and share with you the portal URL
- Type any name in the Server Name, just write your provider’s name, so you will know which service you are on.
- Finally, type the server URL shared by your provider. Ensure to type the URL correctly, and then click Connect
- You may get the following error saying, Cannot Load Portal on your BuzzTV. This means that you have entered the portal URL incorrectly or your provider has added the MAC ID incorrectly. Check the MAC ID shared with your IPTV streaming provider and the URL in the portal. If none of the above works, use a VPN and then Connect.
- If your provider supports the IPTV service with username and password, click User Credentials and add your username and password shared by your provider. In most case, you do not need to use this option, as most Canadian IPTV providers support the stalker portal.
- After connecting to the IPTV service, the channels will immediately load and you can click on any
channel and start playing the stream.
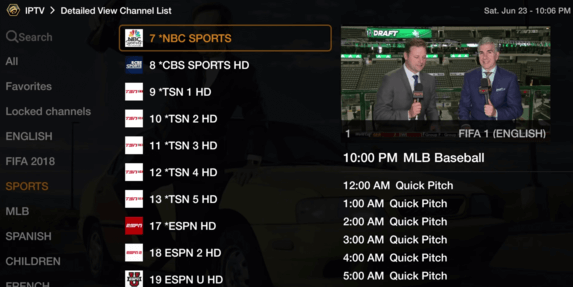
You also get a full-fledged TV Guide when you setup IPTV server on your BuzzTV.
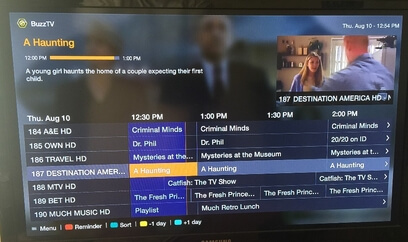
With this, we have completed our steps on how to setup Buzz TV server for IPTV service.